- Home
Company PagesInformation PagesSite Blog
|
|

|
BYPASS HUMIDIFIERS
Install and Service the Typical Bypass Humidifier
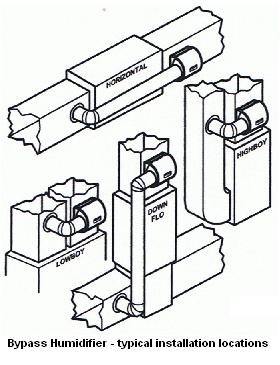
There are dozens of humidification system manufacturers that produce a bypass humidifier. They are all very similar in function and configuration.
Installation procedure
- Determine best mounting location: Bypass humidifier should be mounted on return ducting.
- Tape the template in place, verify template is level, and trace opening to be cut.
- Remove the template, carefully cut opening in ductwork.
- Pull apart the humidifier down to just the housing.
- Place the housing in the opening and attach with sheet metal screws through the provided mounting holes (some units have clips to lock the side-panels to the ducting).
- In the supply plenum, cut an opening for a 6" pipe starter collar.
- Install 6" ducting from supply plenum to opening on humidifier. Install a 6" damper in this ducting. Mark the damper position "Open/winter" and "Closed/summer".
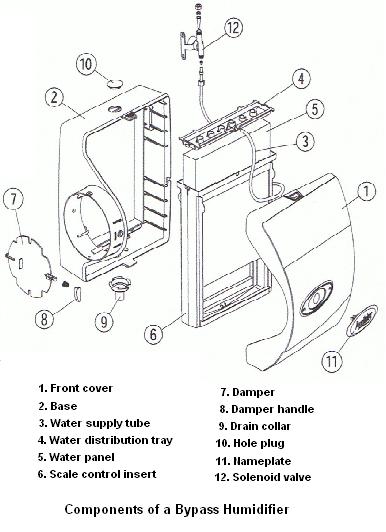
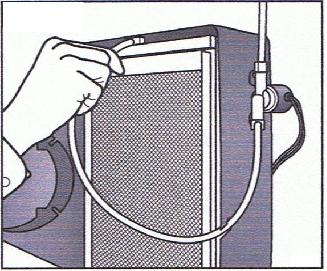
- Re-assemble components into housing. Hook up water supply tubing to top of water panel.
- Mount 24-volt transformer to side of air handler or furnace, in a convenient location for wiring.
- Wire up the high voltage side of transformer (typical 110 volt wiring).
- Mount the duct-humidistat above or before the humidifier, so the humidistat senses the true humidification level of the air from the conditioned space.
- Wire up the low voltage wiring or control wiring. One leg of the low voltage wiring goes directly to the solenoid valve. The other leg goes through a proving switch (current sensing relay, sail switch, or pressure switch), then through the humidistat, then to the solenoid valve.
Refer to manufacturers wiring recommendations. Some furnaces or air handlers have humidifier taps, which eliminate the need for a field-supplied proving switch.
Wiring variations will be necessary if your home's primary heating source is other than forced air, or if your thermostat has humidity control capabilities.
- Install drain tubing to a floor drain or other functioning drain location(drain must have downward slope to the home drain location).
- Hook up the 1/4" water line. Most humidification units come with a self-piercing saddle-valve. These attach around a copper water line. As the valve is tightened in, the water line fills with water and supply is alive to the equipment.
Check your instructions. Most bypass humidifiers accept hot or cold water, softened or hard water.
Water panel repacement / Service
 1... Turn down humidistat. Turn off power. Remove cover and set aside.
2... Panel top should pivot towards you. Lift up and out.
3... Remove water distribution tray. You should be able to leave water line connected.
4... Remove media from frame (slide up and out).
5... Clean out hard water deposits and debris.
6... Check drain tube for flow and free of obstruction.
7... Slide new media into frame. Re-install water distribution tray. Reassembly opposite of disassembly.
8... Check operation.
Return to Main Humidification page
Leave Bypass Humidification and Return to HOME

Please feel free to link to this page from your website. This page's URL is: http://www.perfect-home-hvac-design.com/humidification-bypass-humidifier-installation.html
Enjoy this page? Please pay it forward. Here's how...
Would you prefer to share this page with others by linking to it?
- Click on the HTML link code below.
- Copy and paste it, adding a note of your own, into your blog, a Web page, forums, a blog comment,
your Facebook account, or anywhere that someone would find this page valuable.
| |